

Getting started
A lot of companies still have on-premise data sources that need to integrate with Cloud services. To access these data sources in a Consumption based Logic Apps, you must first download and install the on-premises data gateway and create an Azure resource for it.
This gateway acts as a bridge for efficient data transfer and encryption between your Logic App and the on-premises data sources. It can also be used with other cloud services such as Power Automate, Power BI, Power Apps, and Azure Analysis Services.
In contrast, Standard based Logic Apps do not require the gateway for on-premises data source access. Instead, authentication and authorization for the data source is handled through the provision of information. However, if a built-in connector is not available for the data source, but a managed connector is, the on-premises data gateway is still necessary.
Let's dive deeper into the specifics of setting up such connection via a data gateway!
Installing the Data gateway
To install and configure the Data gateway, we first need to download it, which can be done here. Take note of the requirements, since the gateway can only be installed on a windows machine, as well as it has specific IO needs for optimal performance.
After the download is complete, make sure you execute it as administrator and start the installation process.
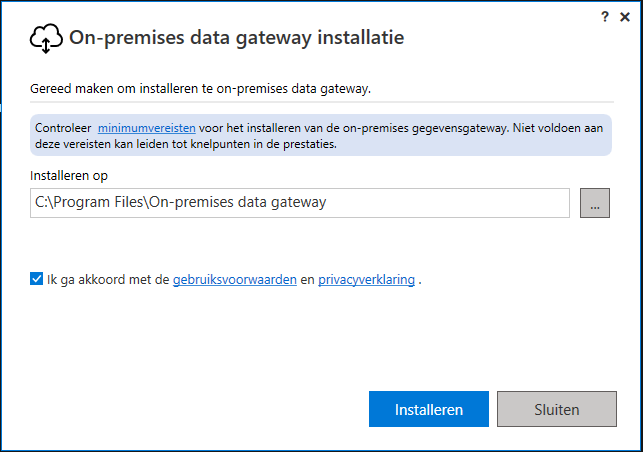
NOTE: All screenshots are in Dutch, but the interface will look exactly the same in other languages.
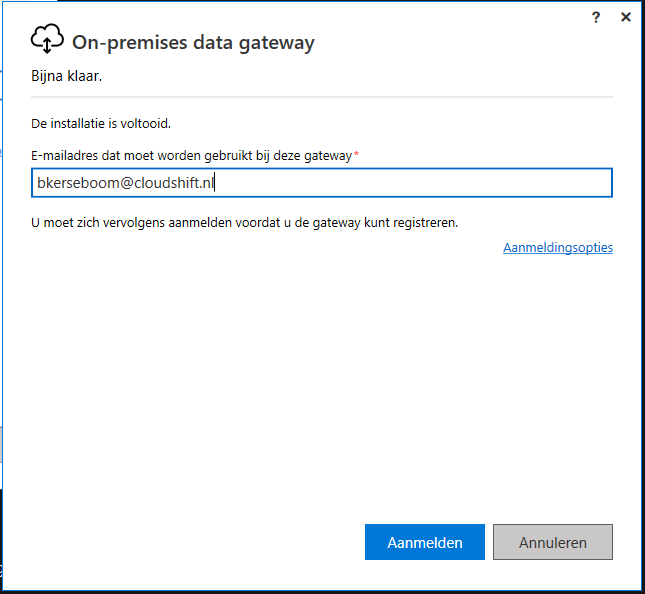
After the installation process has completed, you will be asked to login with an Azure AD Account. If you have access to a Service Account, this would be recommanded to use. For demo purposes, I used my own account.
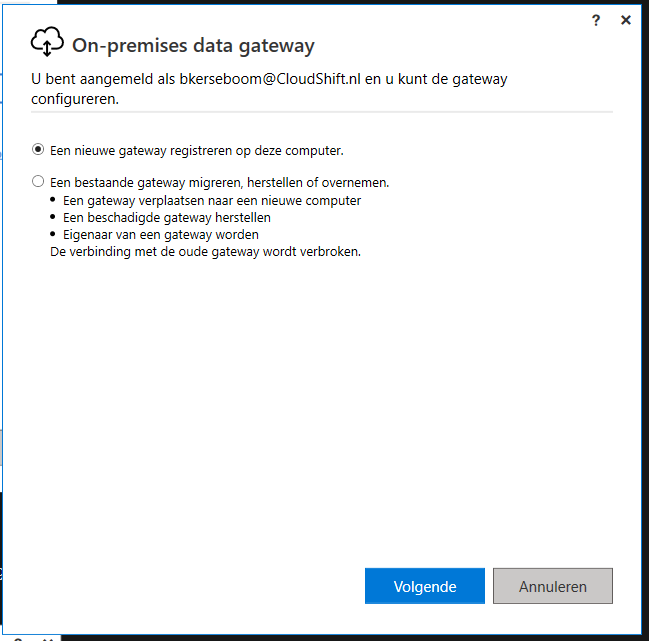
After logging in successfully you will be asked if you would like to Register a new gateway on this computer or to Migrate, restore, or takeover an existing gateway.
Choose the first option to Register a new gateway on this computer and click on Next.
You will be asked to provide information for your gateways configuration. This requires you to specify a unique name across your Azure AD tenant, a recovery key and to repeat this key.
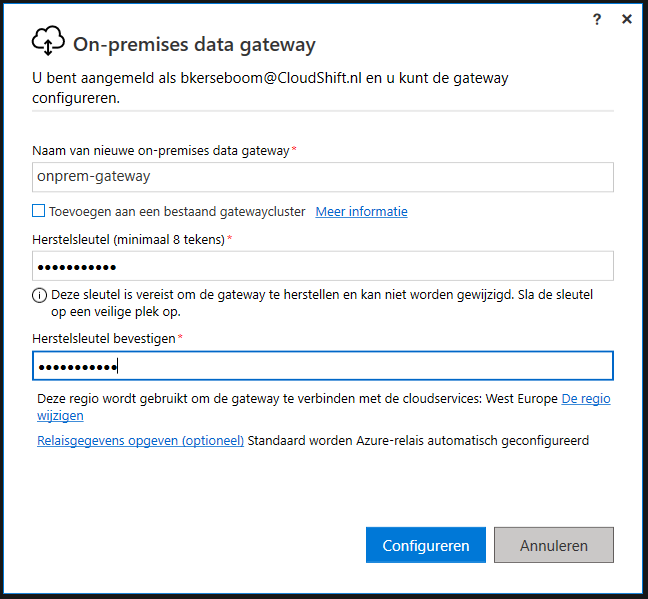
If everything has been supplied, click on configure. Your gateway is now ready on your local/ on-premise machine, but a gateway is still needed in Azure to connect to.
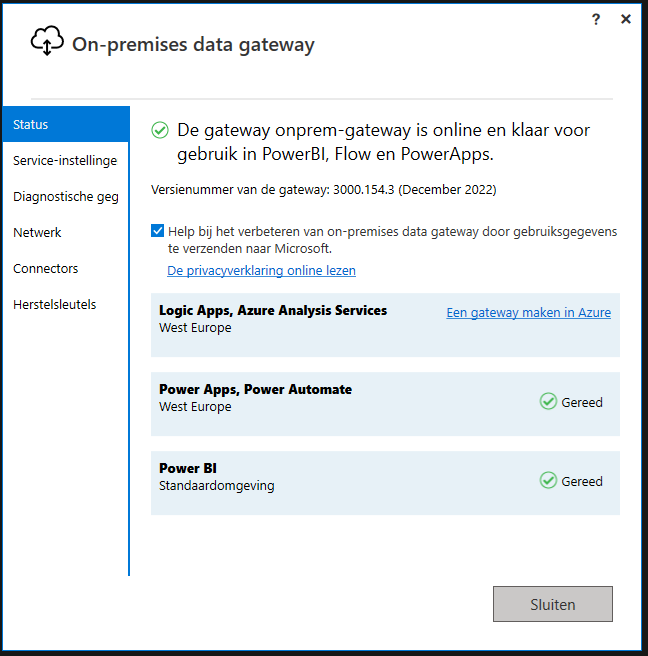
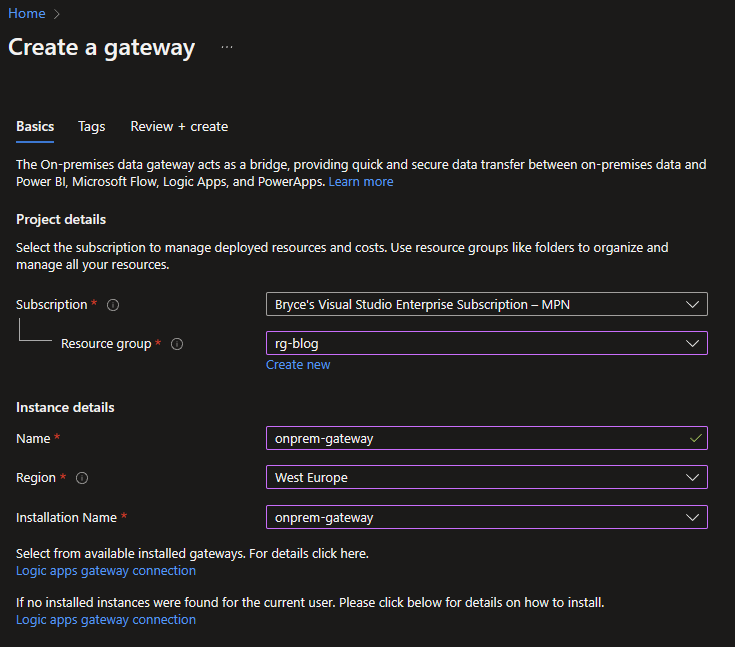
Click on Create a gateway in Azure to open the Azure portal an create a gateway in Azure as well. The portal will be opened and you will be asked to login. Configure your gatewaty in Azure accordingly and click on Review+Create and again on Create if everything looks good.
You might need to restart your On-premise data gateway to see the connection with Azure. If you do, you will be asked to login again and it should show the name of your Azure gateway it is connect to, as well as your subscription ID.

With the installation complete, you will now be able to access your local/ on-premise data sources in Logic Apps as well as in Power Automate, Power BI, Power Apps, and Azure Analysis Services.
What's next?
Often when creating a Logic App, we test it by just running it. Most of the time this doesn't do any harm, especially with small workflows on a Consumption plan. But there is a more integrated way of testing your workflow, on that topic more next week, stay tuned!