

Getting started
Over the past few weeks, I have been focused on developing backup solutions for Azure Data Lake Storage (ADLS). ADLS is a highly scalable and secure data lake that allows organisations to store and analyse large amounts of data. However, it does not have a built-in backup solution, which means that custom solutions must be developed to ensure that data is properly protected.
Backups are important for protecting data against accidental deletion, human error, service failures, and other types of data loss. Regularly backing up data can help minimise the impact of data loss and ensure that data can be quickly and easily restored. With that said, let's dive into it!
Soft delete
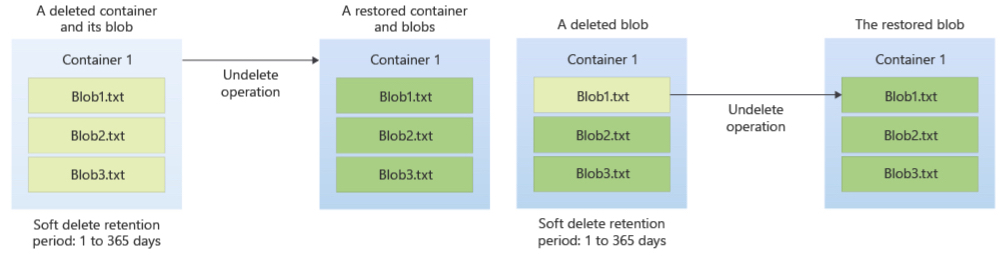
Soft delete is a feature in the Azure Storage Account that allows for the preservation of deleted data for a specified period of time, rather than immediately and permanently deleting it. This feature allows for the recovery of accidentally deleted data, without having to rely on backups.
When a blob or container is deleted in Azure Blob Storage, it is not immediately removed from the storage account. Instead, it is marked for deletion and is retained for a configurable period of time (by default it's 14 days, but it can be extended up to a maximum of 365 days). During this retention period, the deleted blob or container is still accessible and can be restored. After the retention period has ended, the deleted blob or container is permanently removed and cannot be restored.
When a container is deleted, all the blobs, snapshots and metadata will be deleted and all of them will be in a soft-delete state, which can be recovered for a configurable period of time.
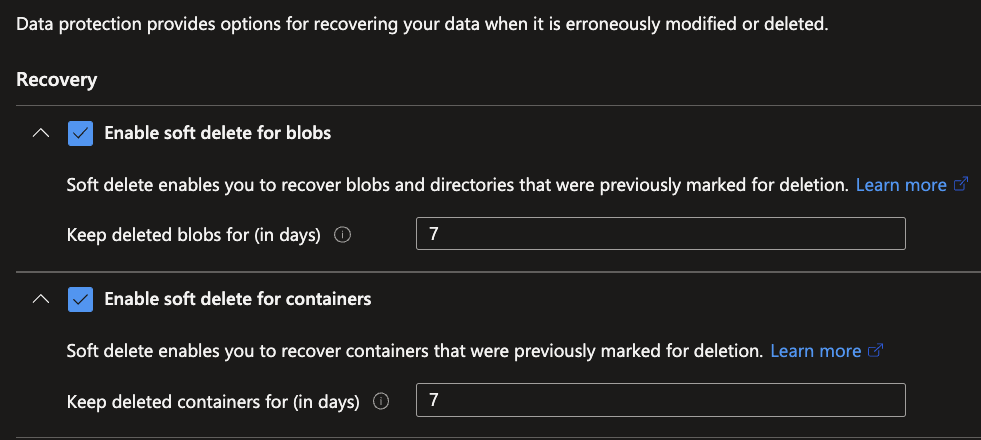
To enable Soft delete in Azure, navigate to your Storage Account and click on Data Protection underneath the Data management category. Check the boxes you require Soft delete for, as well as to specify the period.
Resource lock
Resource lock is a feature in Azure Data Lake Storage (ADLS) that allows you to lock resources such as a container or a file system in order to prevent accidental deletion or modification. This feature can be useful for resources that are critical to your organisation's operations, and need to be protected from accidental or malicious deletion or modification.
There are two types of resource locks that can be applied to ADLS resources:
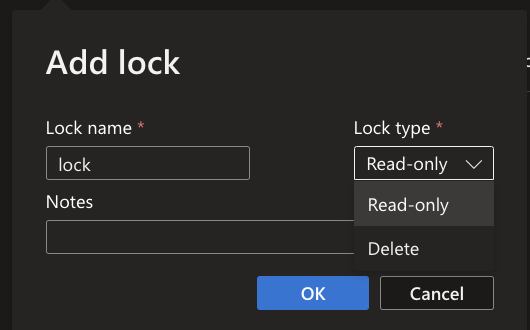
- Delete lock: This lock prevents a resource from being deleted. When a delete lock is applied to a resource, it cannot be deleted until the lock is removed.
- Read-only lock: This lock prevents a resource from being modified. When a read-only lock is applied to a resource, it can only be read, but not modified or deleted.
To enable Resource Lock in Azure, navigate to your Storage Account and click on Locks underneath the settings category. Click on + Add, to configure your lock.
Automation
AzCopy is a command-line tool that utilises server-to-server APIs to transfer data between storage accounts, bypassing the network bandwidth of the client machine. This improves performance and reduces the impact on the client. However, the client machine must have network access to both the source and destination storage accounts to enable these server-to-server APIs and to authenticate to storage accounts, various methods such as Azure Active Directory (Azure AD) and Shared Access Signatures (SAS) can be used.
One of the features of AzCopy is the ability to copy only files modified on or after a specific time using the --include-after parameter, another would be to use --overwrite=ifsourcenewer, which would always make sure the lastest version is available, but this option would require more compute power.
Microsoft recommends using Azure Virtual Machines (VMs) for handling large amounts of data and millions of files. However, Azure functions with a premium plan may also suffice for less data-intensive scenarios. However, Microsoft has had bad experiences with using temporary compute in serverless services and Azure DevOps pipelines for large data transfers.
The basic syntax of the AzCopy command is as follows:
AzCopy [source] [destination] [options]Where:
sourceis the path to the source file or directory. This can be a local file system path or an Azure storage account path.destinationis the path to the destination file or directory. This can be a local file system path or an Azure storage account path.optionsare various options that can be used to control the behavior of the AzCopy command.
For example, to upload all files from a ADLS to a backup ADLS, the following command could be used:
azcopy copy
"https://stdatalake123456789.blob.core.windows.net/curated/?sv=2018-03-28&ss=bjqt&srt=sco&sp=rwddgcup&se=2019-05-01T05:01:17Z&st=2019-04-30T21:01:17Z&spr=https&sig=MGCXiyEzbtttkr3ewJIh2AR8KrghSy1DGM9ovN734bQF4%3D"
"https://stdatalakebackup123.blob.core.windows.net/curatedbackup/?sv=2018-03-28&ss=bjqt&srt=sco&sp=rwddgcup&se=2019-05-01T05:01:17Z&st=2019-04-30T21:01:17Z&spr=https&sig=MGCXiyEzbtttkr3ewJIh2AR8KrghSy1DGM9ovN734bQF4%3D"
--recursive=true --overwrite=ifsourcenewer --include-after $date
Custom RBAC Role
In Azure, Custom Role-Based Access Control (RBAC) roles allow administrators to create custom roles with specific permissions for Azure resources. These custom roles can be used to restrict access to certain actions on Azure resources, such as deletion.
To restrict deletion from Azure Data Lake Storage (ADLS), an administrator can create a custom RBAC role that only includes the permissions necessary for reading and writing to the ADLS account, but not for deletion. This custom role can then be assigned to users or groups that should have access to the ADLS account, but not the ability to delete files. This can help to prevent accidental or unauthorised deletion of important data.
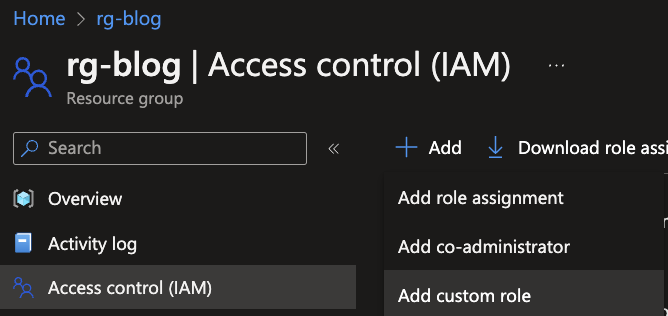
Custom roles can only be applied to a subscription or at resource group level, to create such a role go to the resource group in which your Azure Data Lake resides within Azure. Click on Access control (IAM) and on + Add. Choose the Add custom role.
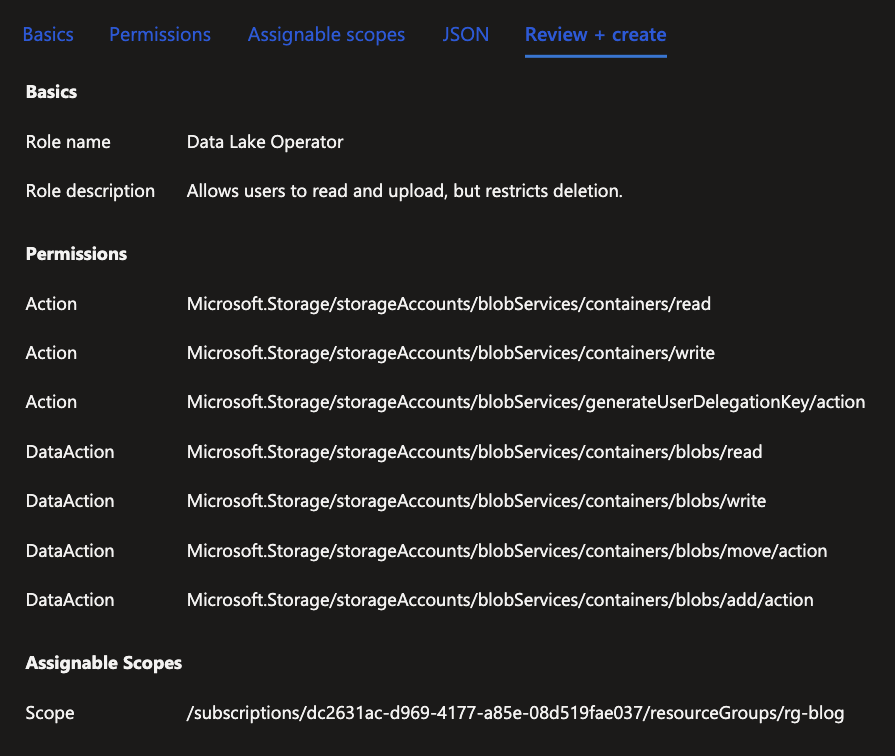
Specify a proper name, a description and select the Clone a role option. Search for the Storage Blob Data Contributor role to use as reference.

Continue to the next tab to set the permissions. From here, remove everything that specifies delete capabilities and continue to Review + create.

Review your custom role and click on Create if it contains everything that is required. With the creation of this role, it can be applied to all users that work on the ADLS.
What's next?
Next week will not be a technical blog, but a personal recap of 2022. It has been a blast and a lot to look back on! For now a Merry Christmas and enjoy the holidays!