

Getting Started
Are you looking to optimize your Azure resource management? Automated tasks can be a huge help! These tasks can be set up for specific resources and can cover a range of options depending on the resource type. Let's say you have an Azure storage account - you can set up an automated task to send you the monthly cost for that account. Or, perhaps you have an Azure virtual machine - you can create an automated task to turn it on or off at a predetermined schedule. The possibilities are endless and can really streamline your Azure resource management.
Before we start looking at Automation tasks, it is important to understand how they work. Automation tasks are actually Logic Apps that run workflows, using the consumption plan. Once you've created your task, you can view and edit the underlying workflow using the workflow designer. And once the task has completed at least one run, you can check out its status, history, inputs, and outputs for a deeper understanding of how it performed, just like you are used to with Logic Apps itself.
Let's have a look on how to use these tasks!
Creating Automation tasks
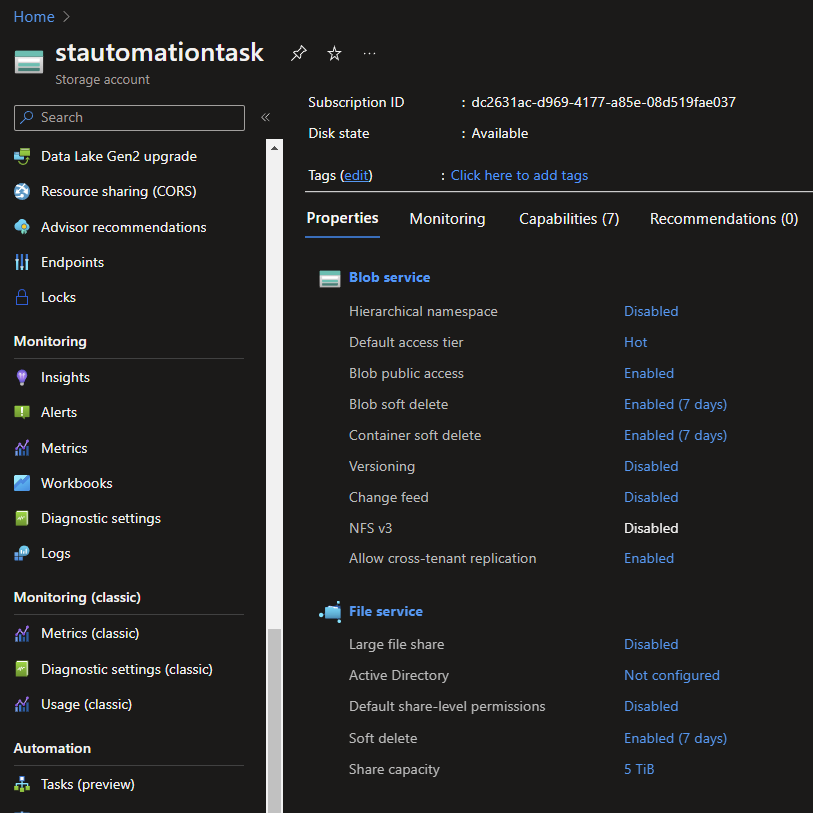
Let's start by logging into the Azure Portal and navigating to a resource that you would like to enable an Automation task on, in this example I will be using an Azure Storage Account.
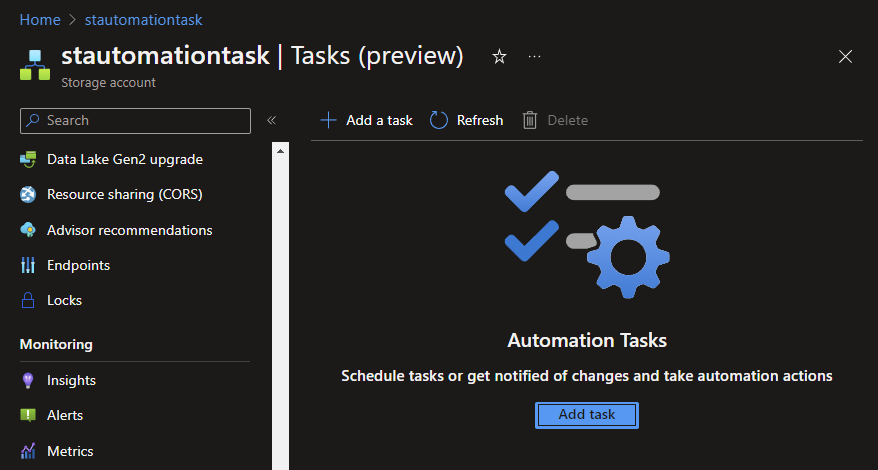
Within the blade navigate to the Automation category and click on the Task (Preview) option.
Within the Tasks panel, click on + Add a task to select a Automation task.
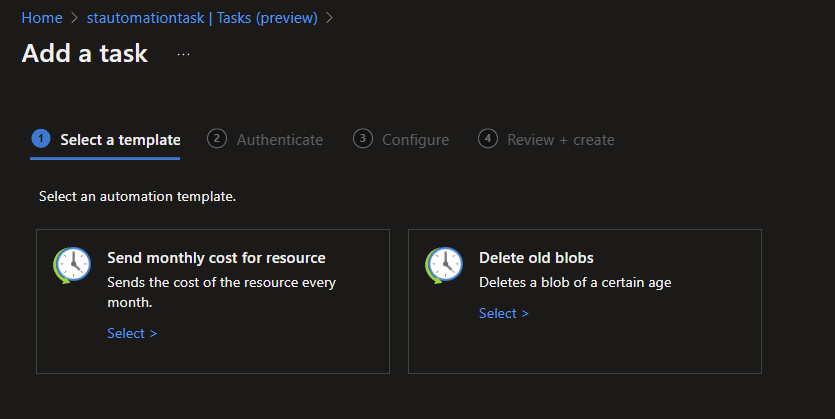
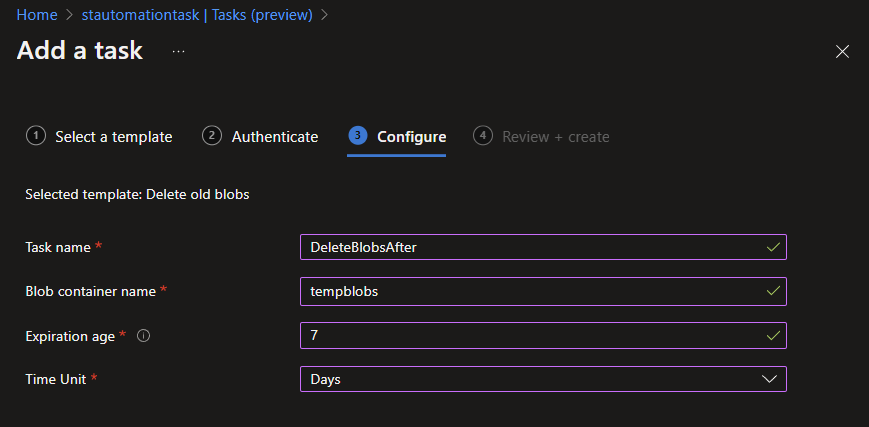
Choose one of the available Automation task templates and click on select > within the tasks. In this example I will use the Delete old blobs.
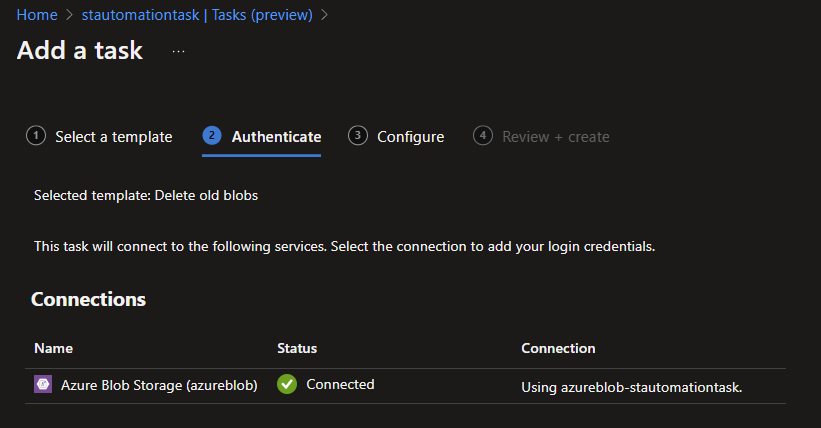
After selecting a template Authentication might need to be setup, if it isn't connected by default a create option will appear in the connection tab. To authenticate you will need to login with a Azure AD account, it is a good practise to use a service account for such cases.
If the authentication has been setup click on the (3) Configure step to continue.
After setting up the Authentication, the Task will need to be configured in this case a Task name, Container name, a time and Amount of units (days, weeks or months).
When everything is configured as you need, click on the Review + Create, check everything and click on Create to create the Automation task.
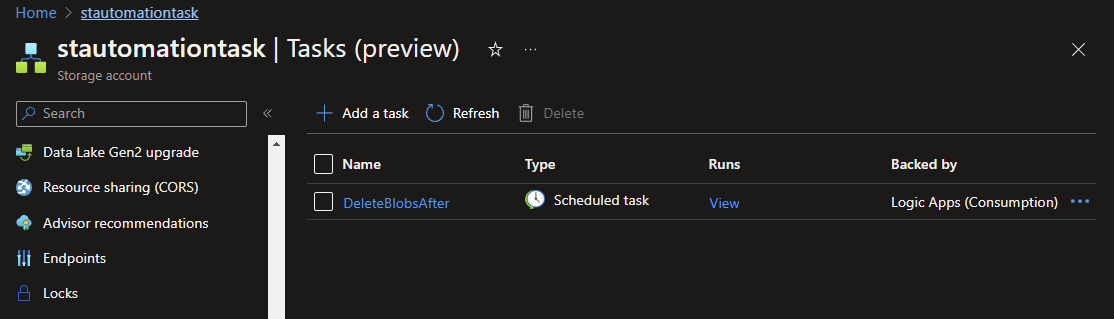
When the task has been created it will appear in the Tasks (Preview) panel and you will be able to check the history by clicking on View underneath the Runs column. When clicking it a full run history of your Automation task will show up, just like in Logic Apps.
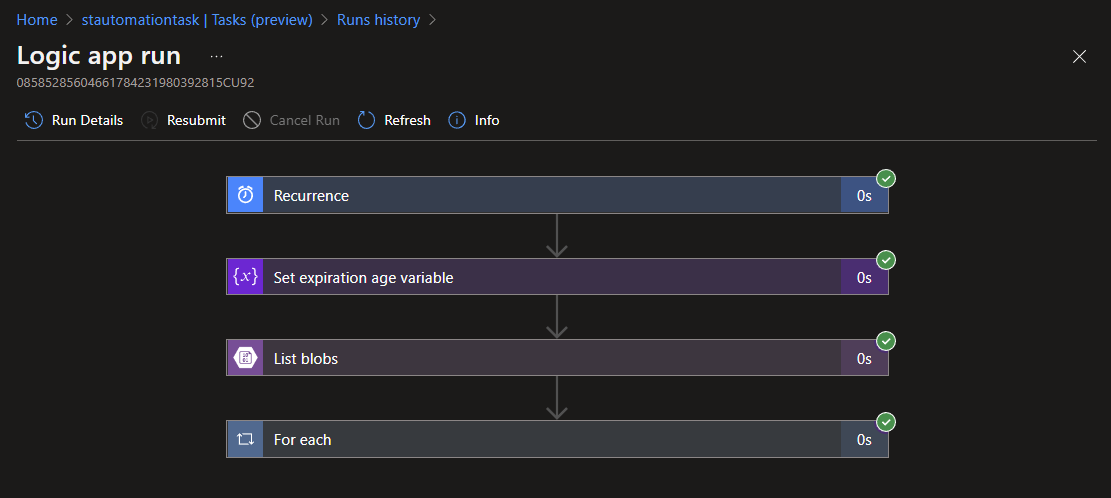
When clicking on of the tasks you will see a step by step run of the workflow.
With this you can now Automate all your resources! Each Azure resource will come with a Send monthly cost for resource template, as well as for Virtual Machines the On, Off and Deallocate option, Storage Accounts to delete blobs and Cosmos DB to send query results per mail.
What's next?
With the recent activities on creating custom Logic Apps connectors for CloudShift in Azure Functions, API Management has become more and more important and offers the option to also add Logic Apps as an API. Let's look into this next week! Stay tuned.